Disclosure: some of the links below are affiliate links, meaning, at no additional cost to you, I will earn a commission if you click through and make a purchase.
Given the amount of security breaches in the news recently, I thought it was time to bring my personal data backups back under my control. I wanted control over everything and to not rely on a cloud provider to store off site backups. To me, with the amount of data I’m storing, the piece of mind is worth the cost. If there’s a data loss, I can only blame myself.
I’ve been running a Synology DS918+ for network data storage for a few months, which has exceeded all of my expectations. Especially after migrating from an outdated HP ProLiant MicroServer. Configuring DSM’s Hyper Backup to run local backups to an external USB Seagate 4TB drive
was a breeze. After letting the process gain my trust, it was time to figure out how to ship backups off site. Previously, I was using CrashPlan to run backups to a set of hard drives that I would rotate through a Thermaltake BlackX docking station
. Whenever I made the 100+ mile trip to my parent’s house, I’d pull the current drive, physically carry it with me, lock it in their fire proof safe, then take back the dated drive. A bonus was that I always had a backup in cold storage, which is essential for protecting yourself from ransomware.
The backup strategy worked well and I could probably recreate something similar on my new Synology platform, but it had a few drawbacks that I wanted to overcome. Of course, driving the backup drives back and forth wasn’t ideal. However, the biggest issue was: I had to remember to take and actually rotate the drives. Being human, rotating backups wasn’t always the first thing on my mind and I don’t make the trip very often. So, if I forgot to take a drive, the backup would slowly grow old and less useful. This time, I wanted to eliminate the sneaker net, remove any effort on my part beyond setup, and maintain control over the data.
While clicking through the Hyper Backup Backup Wizard to weigh out my options, I found that I could choose a Remote NAS device as a destination. The only problem was, I didn’t have another Synology NAS. You’ll want to pick the device that best fits your needs, but consider that as a backup device, you likely won’t need all of the features of your primary storage device. Here are some options that won’t break the bank:
- DiskStation DS118
- Low cost with one drive bay, but offer’s no RAID for drive redundancy
- Maximum raw capacity of 12 TB
- DiskStation DS218+
- Two drive bays; supports RAID for drive redundancy
- Maximum raw capacity of 24 TB
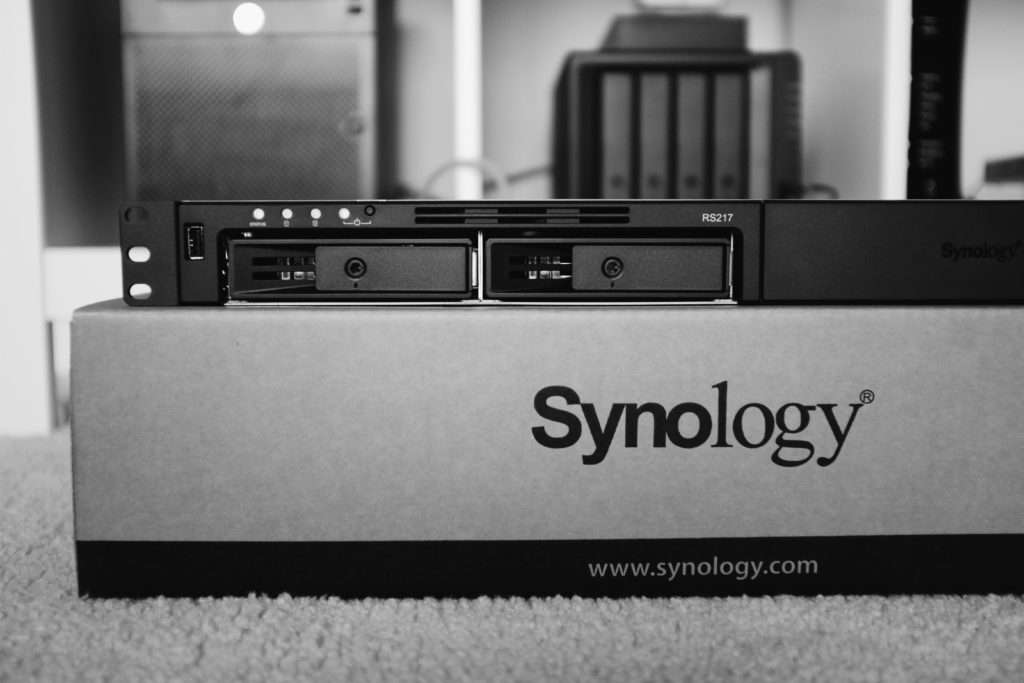
- RackStation RS217
- Rack mountable
- Two drive bays; supports RAID for drive redundancy
- Maximum raw capacity of 24 TB
I already had a small wall mounted rack at my parent’s, so I ultimately went with the RackStation RS217. To cut some costs, I re-purposed a few old 2TB drives that I had laying around. As a backup device, their performance doesn’t really matter to me and RAID will allow for one drive to fail. If you’re going to buy new drives, I highly recommend Western Digital Red. They’re purposely built for NAS devices and have a reputation for reliability.
Going forward, I’ll assume that you already have the basic setup with volumes created complete on both your primary and backup NAS devices. You can approach your remote backup configuration one of two ways:
- Install your Backup NAS at a remote location from the start, then backup your entire data set over the Internet.
- Temporarily install you backup NAS locally, seed your entire backup set over your local network, then move the device to a remote location.
Since I’m backing up ~2TB of data, I went with the latter option to avoid waiting a month to complete the first backup. So, that’s the process that I’ll be covering below.
Prerequisites
- QuickConnect ID setup for backup NAS device on our local network.
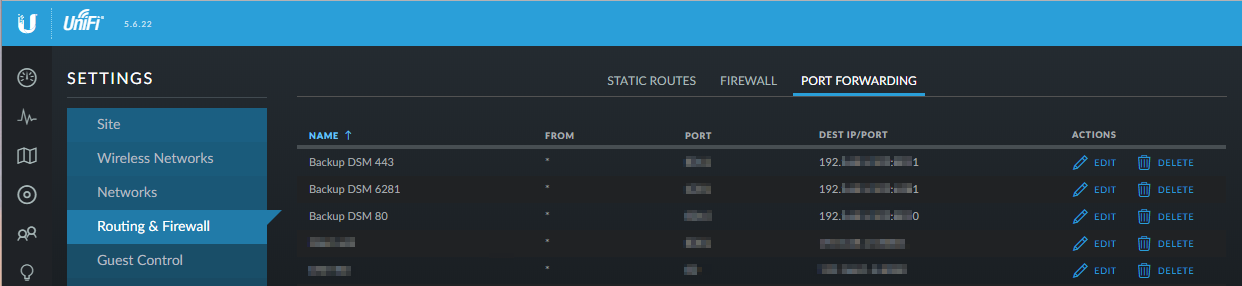
- Configure port forwarding to the Backup NAS; this process will vary depending on your network configuration. If you already have ports forwarded to your Primary NAS, you’ll have to choose new ports to avoid a conflict. Here’s what my configuration looked like on my Ubiquiti Unfi Security Gateway (USG):
Backup NAS Configuration
1. Login to DSM
2. Open Package Center
3. Under Explore, click Backup
4. Install Hyper Backup Vault
5. Hyper Backup Vault requires no configuration
6. Open Control Panel
7. Under File Sharing, click Shared Folder
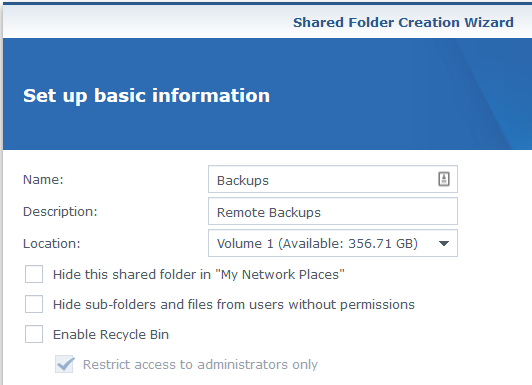
8. Click Create to start the Shared Folder Creation Wizard
9. Enter a Name and Description, uncheck Enable Recycle Bin, click Next
 10. Check Encrypt this shared folder if you want to encrypt your remote backups while at rest, click Next
- If you choose to encrypt your shared folder, you will need to manually mount the shared folder every time your device reboots or configure Key Manager.
11. Click Apply
12. The Edit Share Folder window will appear, choose a user to have Read/Write permissions, click OK
- Best practice is to create a dedicated user account for remote backups.
Primary NAS Configuration
1. Login to DSM
2. Launch Hyper Backup
3. Click the + in the lower left corner, click Data backup task
4. Click Remote NAS device, click Next
5. Leave Create backup task toggled
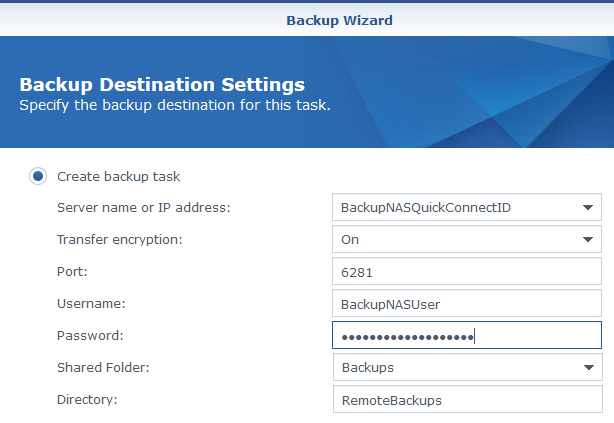 6. In the Server name or IP address field, enter your Backup NAS QuickConnect ID
- If you click the drop down, the Backup Wizard will attempt to locate the Backup NAS on your local network. You do not want to do this. Configuring the backup task using the QuickConnect ID will force Hyper Backup to connect over the Internet, which is essential once the device is moved to the remote location.
7. Set Transfer encryption to On
8. Leave Port set to 6281; ensure that the port is forwarded to the Backup NAS
9. In the Username field, enter your Backup NAS user account
10. In the Password field, enter your Backup NAS user account password
11. Click the Shared Folder drop down, the Backup Wizard will now connect to your Backup NAS and list the backup shared that you created earlier, click the name
- If you receive an error here, double check that your Backup NAS network configuration and port forwarding at your router.
12. In the Directory field, give your back up directory a unique name
13. Click Next
14. From this point forward, the remaining Backup Wizard configuration is no different from configuring any other backup task; choose the shared folders that you want to backup, click Next
15. Select any DSM applications that you want to backup, click Next
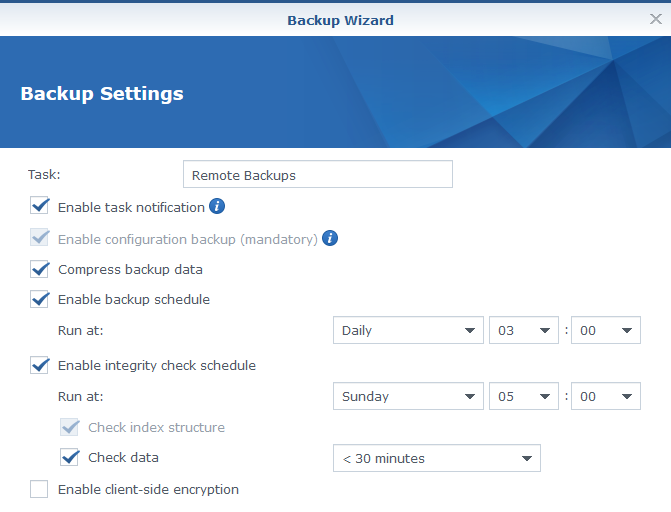 16. In the Task field, enter your backup task name
17. Check Enable task notifications if you want to receive notifications when the job runs
18. Check Compress backup data
19. Check Enable backup schedule, then configure the run at time
- Consider that you’ll be backing up over the Internet and your backup speed will be limited to the slowest Internet connection in the pair. The frequency should be at least far enough apart to complete an average backup.
- You can leave this field unchecked if you want to manually run the backup tasks yourself.
20. Check Enable integrity check schedule; the default values will suffice, but you can uncheck this field to run integrity checks manually
21. Check Enable client-side encryption if you want the backup encrypted at the client, click Next
22. Check Enable backup rotation
23. Configure backup rotation settings
- Rotation settings should be set to fit your backup scenario. If you don’t want to think about it, choosing Smart Recycle is always safe. The Synology Knowledge Base has more information on this topic if you’d like to learn more.
24. Click Apply
25. Run the back task to begin seeding your backup
Wrapping Up
Once the backup is complete, reinstall your Backup NAS at a remote location. The piece to remember here is that you must reconfigure the proper port forwarding at the new location. Otherwise, the remote backup task won’t be able to connect and fail.