Disclosure: some of the links below are affiliate links, meaning, at no additional cost to you, I will earn a commission if you click through and make a purchase.
I’m relatively new to the Synology device ecosystem and have been spending time learning the nuances of what I can and cannot do within it. As part of my overall backup strategy, one of the things on my list to figure out was: rotating multiple USB backup drives. I’m a big, big, fan of keeping a set of offline, air gapped backups. Keeping cold backups on standby is a great strategy in protecting yourself from ransomeware, data corruption, or a total system meltdown.
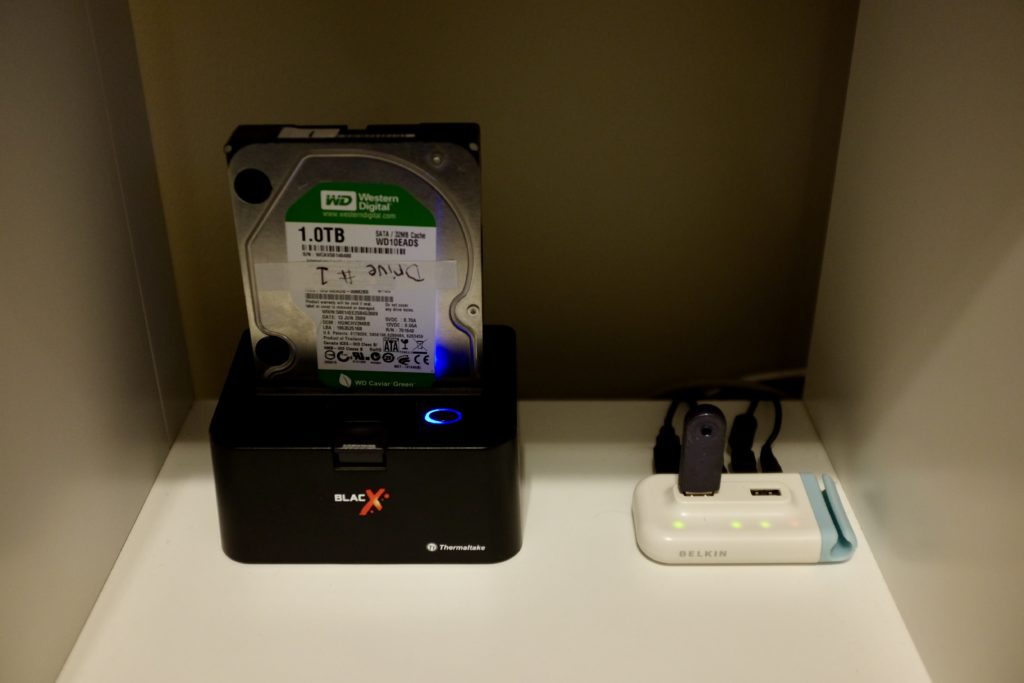
I already had Hyper Backup configured for other backup tasks and trusted its capabilities, so I wanted to use it for this job if possible, too. With a little trial and error, I have a working USB drive rotation solution using only Hyper Backup, a Thermaltake BlackX drive dock, and an iHome Smart Plug. The process is completely automated except for occasionally physically rotating the drives. I don’t have a robot to do that part for me, yet.
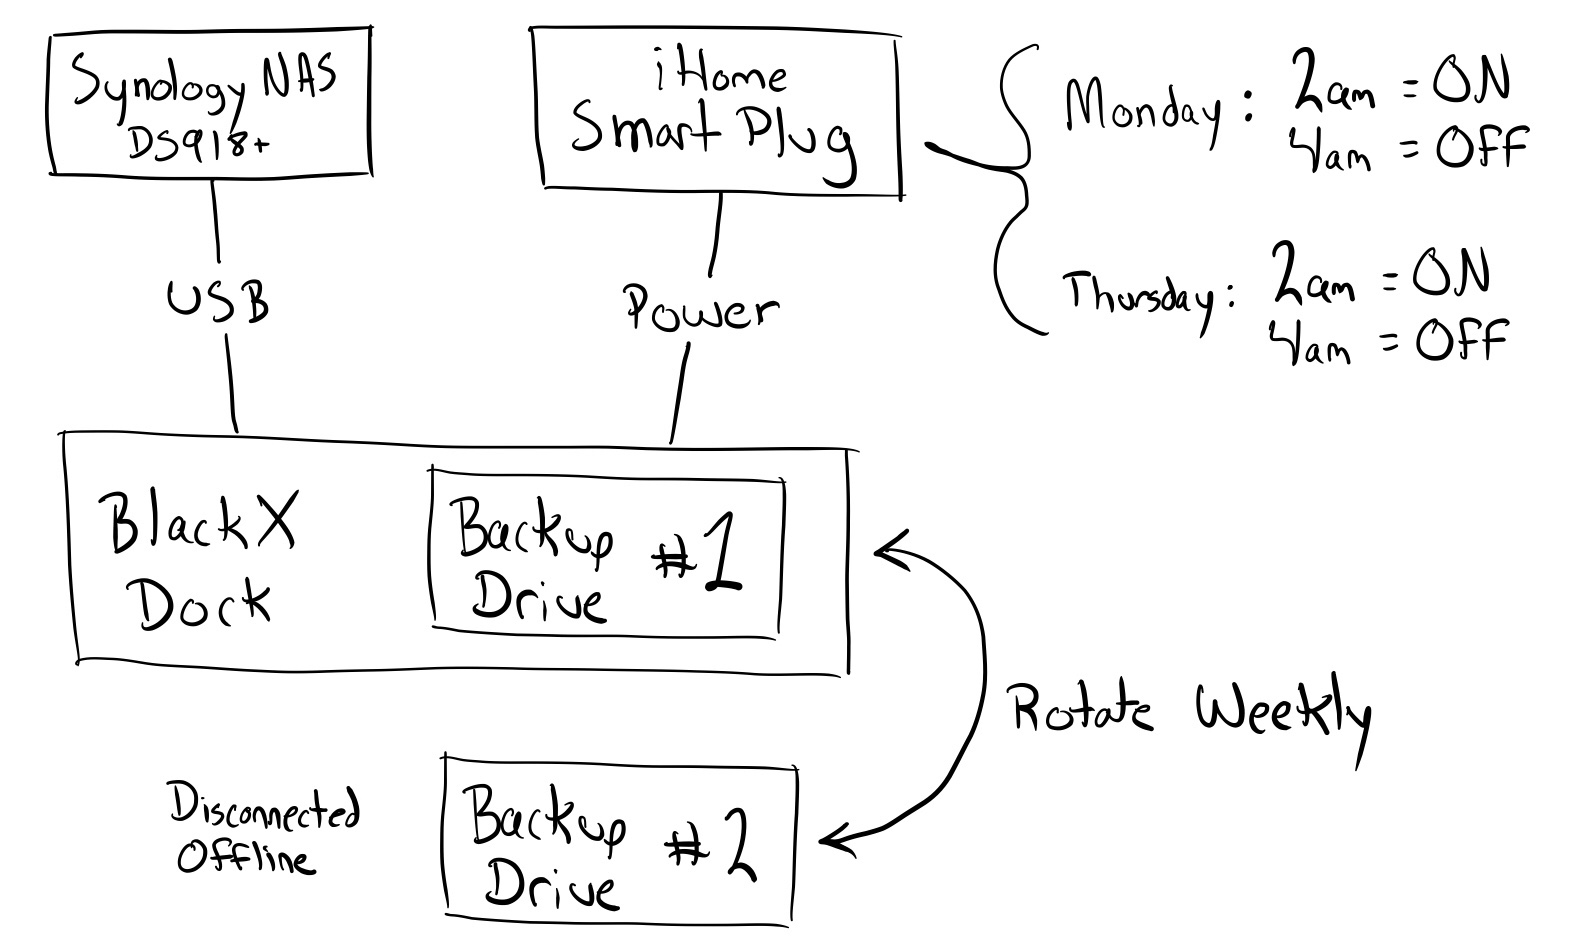
The drive dock is connected to the Synology NAS via USB. Any SATA drive can be dropped in and used for backups after a little first time configuration. I’ve configured two drives to rotate, but I don’t see why you couldn’t rotate more if you wanted. Prior to a backup task starting, the iHome Smart Plug powers up the drive dock, DSM mounts the drive, Hyper Backup runs the backup task, then unmounts the drive when it’s done. The unmount is a key step in the automation process. Unmounting the disk allows the smart plug to power down the drive without upsetting DSM, and gives you a chance to freely rotate your drives.
I have the smart plug and Hyper Backup configured to power up and run backup tasks twice a week in the middle of the night. The drives just need powered up long enough for your backup task to actually complete and a drive consistency check to occasionally run. Out of 168 hours in a week, one drive is only ever attached to the NAS and powered on for four of them.
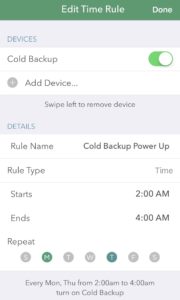
Smart Plug Configuration
I chose the iHome Smart Plug because it’s compatible with Amazon Alexa, Google Assistant and HomeKit. It’s worked out so well that I bought two more for another project. Controlling it is simple; just download the iHome Control app from your respective App Store. Once the you have the device added to the iHome app, setting up a schedule is very straightforward. Here’s what mine looks like:
Drive #1 Configuration
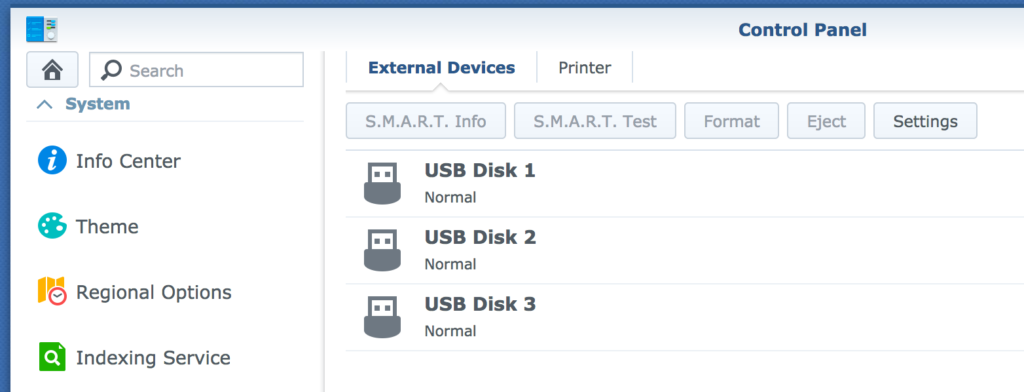
1. After everything is hooked up, drop in your first drive. Login to DSM, open Control Panel, click External Devices, find your new USB Disk, then Format it.
2. In Control Panel, click Shared folder
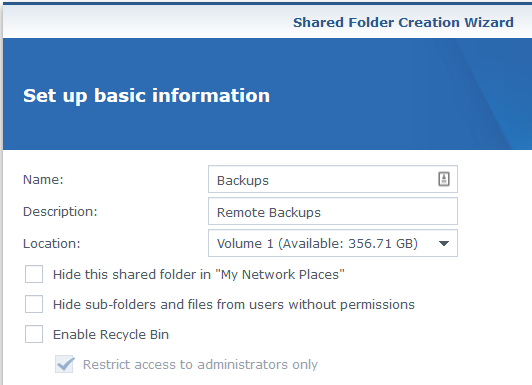
3. Click Create to start the Shared Folder Creation Wizard
4. Enter a Name and Description, uncheck Enable Recycle Bin, click Next
5. Check Encrypt this shared folder if you want to encrypt your remote backups while at rest, click Next
- If you choose to encrypt your shared folder, you will need to manually mount the shared folder every time your device reboots or configure Key Manager.
6. Click Apply
7. The Edit Share Folder window will appear, choose a user to have Read/Write permissions, click OK
Backup Task Configuration
1. Open Hyper Backup, click the + in the lower left corner, click Data backup task
2. Under the Synology section, click Local folder & USB
- Click Local folder & USB (single-version) if you don’t need file versioning
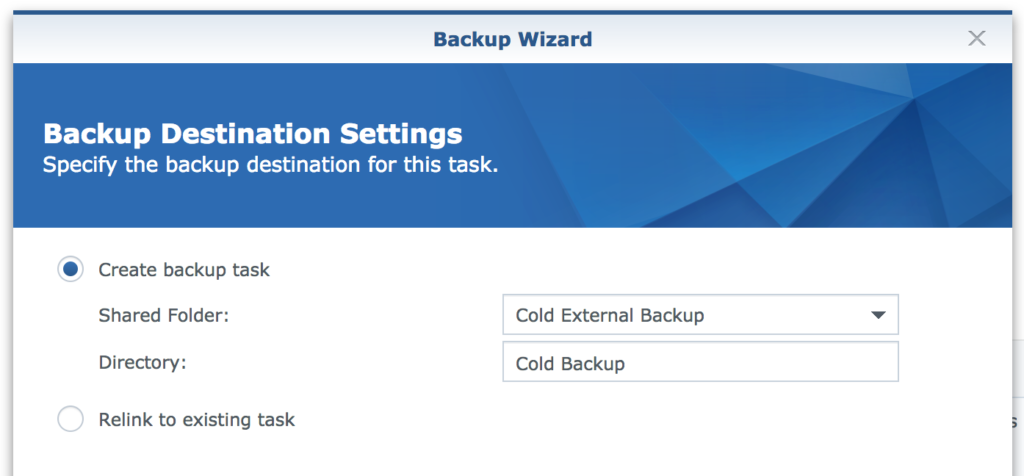
3. The Backup Wizard will launch, toggle Create backup task, then click the Shared Folder drop down and select the share that you just created on your external disk, enter a Directory name; this will be the name of your backup file, click Next
4. Do not select any shared folders, click Next
- Selecting no shares will save you time and hassle later. Hyper Backup will create an very small backup file that you’ll need to copy to your other drives later. Don’t worry, we’ll circle back and update these settings to actually backup shares.
5. Select any applications that you’d like to backup, click Next
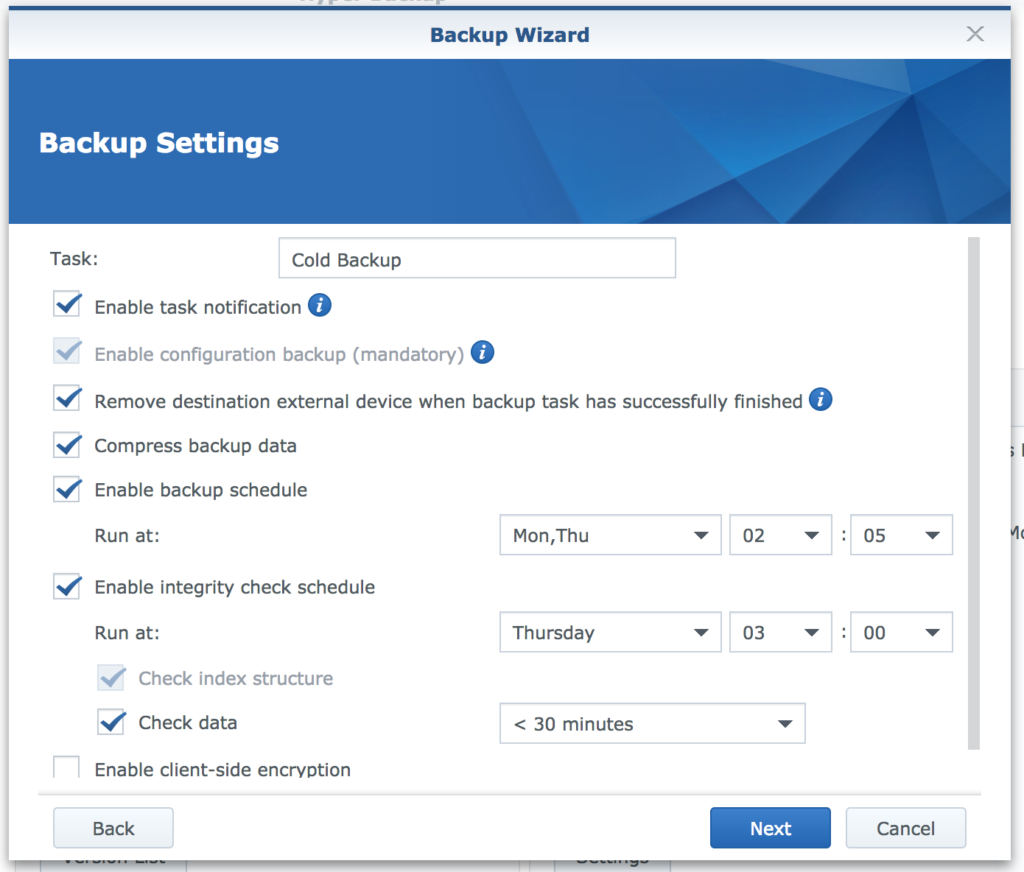
6. The Backup Settings configuration is important and will vary by scenario, here’s the key points:
- Check Remove destination device when the backup task has successfully finished; this what forces the disk to unmount after the task completes, allowing it to gracefully power off
- Set the backup schedule to what fits your scenario; this schedule should match your smart plug config, but start a few minutes after so the disk has time to mount
- Enable the integrity check to run during your scheduled backup window, after your backup task has had time to complete
7. After clicking Next, set your Backup Rotation settings; If you don’t want to think about it, choosing Smart Recycle is always safe—read more about these options here—click Apply
- Skip this step if you choose the single-version backup task earlier
8. Choose to back up now
9. After the backup is complete, remount the backup disk
10. Open File Station, find your backup share and locate the backup file
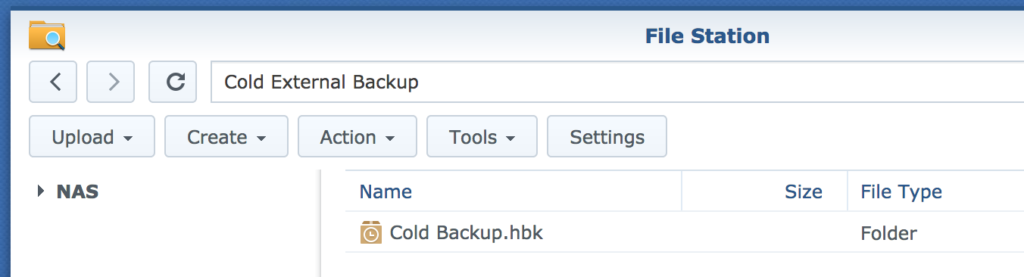
11. Copy the .hbk to a temporary location off of the USB drive of your choice
12. Unmount the disk and remove Drive #1 from the dock
Drive #2 Configuration
1. Drop in your second drive, open Control Panel, click External Devices, find your new USB Disk, then Format it
2. In Control Panel, click Shared folder
3. Click Create to start the Shared Folder Creation Wizard
4. Enter the same Name and Description that you used on Drive #1, uncheck Enable Recycle Bin, click Next
5. Check Encrypt this shared folder if you want to encrypt your remote backups while at rest; again, use the same encryption information as Drive #1, click Next
6. Click Apply
7. The Edit Share Folder window will appear, choose a user to have Read/Write permissions, click OK
8. Open File Station, and copy over your backup .hbk file to the your new share
- At this point, both drives should have identical share names with the same .hbk backup file inside of it
Backup Your Data
1. Open Hyper Backup
2. Select your backup task, then in the lower right corner, click Settings
3. On the folders tab, select all of the shares that you’d like to backup, click OK
4. With your backup task still selected, click Back up now
5. Go get a beer
6. Once the backup completes, pull the drive from the dock and drop in the other
7. With your backup task still selected, click Back up now
8. Go get a beer
Wrapping Up
After you finish hydrating, your drives are ready to rotate. Use the iHome app to power off the dock and wait for the automation to kick in.
 10. Check Encrypt this shared folder if you want to encrypt your remote backups while at rest, click Next
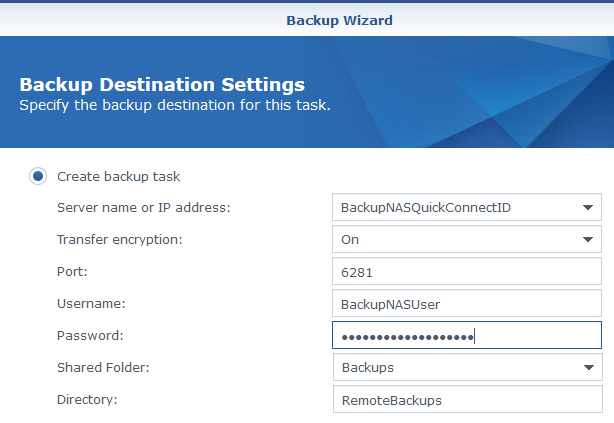 6. In the Server name or IP address field, enter your Backup NAS QuickConnect ID
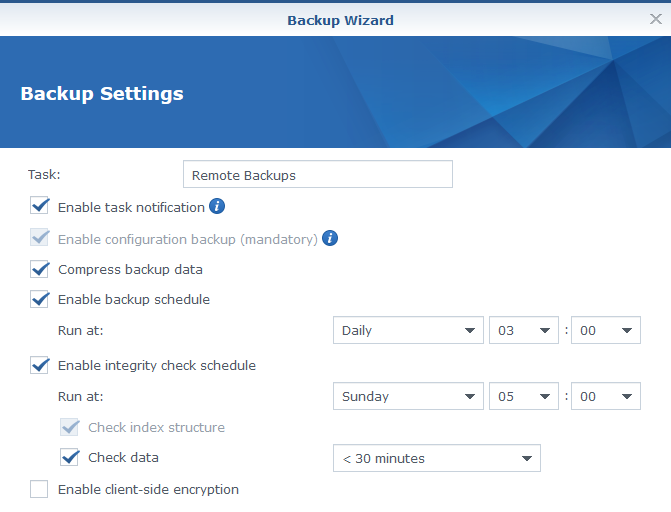 16. In the Task field, enter your backup task name